

How To Clean Film Off Car Headlights
Has all your DIY car headlight restoration been simply on the outer office of your vehicles' lens? This tin be the reason why you even so experience a foggy oxidized headlight shortly afterward a restoration procedure! Headlights are one of the most important features in a car for many reasons. They are the eyes and beauty of a motorcar. Without them, driving at night would be impossible. Nonetheless, although every vehicle comes with a headlight, the brightness and how far the beam can reach depends on how clear the headlights await.
An oxidized or foggy looking headlight hinders a commuter from seeing the entire perspective and objects on the road. This can lead to serious safe risks to the driver such every bit collision or aptitude wheel equally a result of driving into a ditch or pothole. With a headlight lens restorer, the original ability of your axle is guaranteed but just if you clean both the inside and the outer parts of your auto headlights. Cleaning the inside of a car's headlight tin pose a chip of a claiming especially when they have their bulbs, lens, and reflector in a sealed housing.
These sealed headlights are more than affordable and durable merely, at that place is a catch! In the event of a broken headlight seedling or a burn out, yous will accept to replace the entire headlight on that section. So, how exercise you clean the inside of a sealed headlight? The first step is to decide the blazon of headlight your car has.
Types of Car Headlights
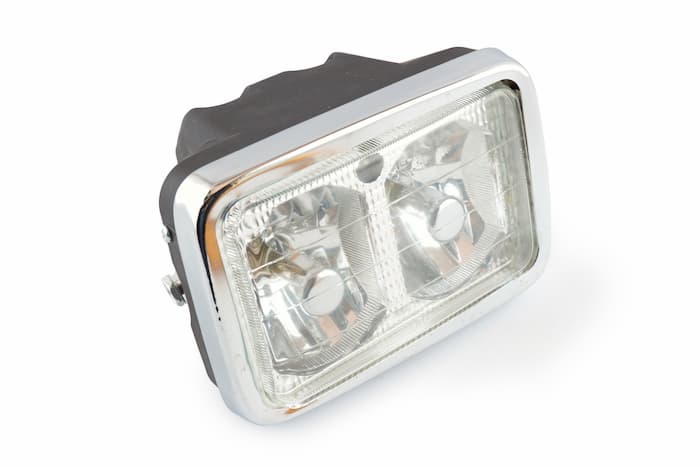
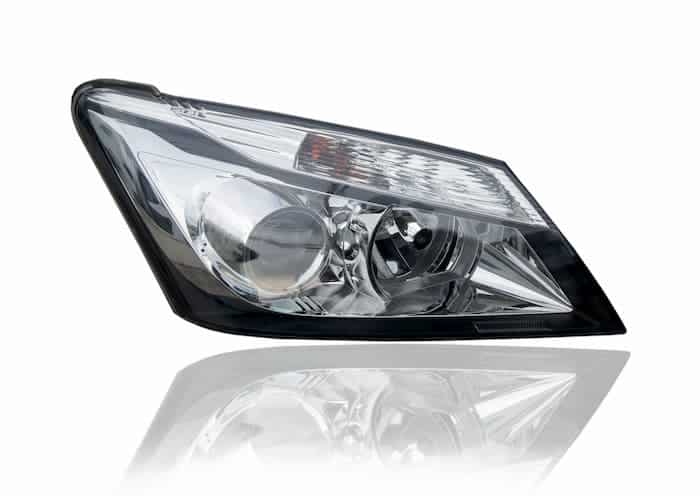
Sealed Headlights: These headlights come in a unmarried to four lite organization design. Each low-cal organization features both low and high beams depending on the number of bulbs. To know if your auto uses a sealed headlight, open your car hood and check if bolts are property a flat metallic slice roofing the headlight and its surrounding. If in that location is, and then y'all are using sealed headlights.
Composite Headlights: The composite headlight was introduced correct later the sealed headlights. These headlights feature a replaceable lighting system. Unlike the sealed beam with glass housing, the composite headlights are mostly made of plastic lenses with enough space for car designers to install a navigation light or fog lamp.
HID Headlights: High-intensity belch (HID) headlights are reputable for their brighter beam. They contain xenon gas and four times longer than the composite headlights. This is because they consume less power and require an independent fuse called "ballast" to command the power that flows to the seedling. However, they are more than expensive to replace than the sealed and composite headlights.
Projector Headlights: As the name suggests, the projector headlight is built for focus. This headlamp features a metal shield in front end of the seedling that moves down to permit a full-length focus on the direction of the headlight. Projector headlights come up in both HID and Halogen versions. Thus, making it expensive to buy or replace as compared to the same headlights.
Led Headlights: Led headlights were get-go introduced in loftier stop cars like Mercedes Benz, Lexus, and Audi. These headlights are more avant-garde in engineering science and brand employ of light emitting diodes instead of filament bulbs and gas. Because of their depression energy demands, they tin besides exist used on other low grade cars. However, in terms of brightness, there isn't much departure betwixt halogen headlights and LED.
Five Simple Steps On How To Clean The INSIDE of a SEALED HEADLIGHTS
Now that you are conversant with the type of headlight on your vehicle, if you own a sealed headlight and it looks cloudy, foggy, or oxidized, follow the unproblematic steps for your car headlight restoration.
Pace 1: REMOVE THE HEADLIGHT HOUSING.
Starting time things first! To proceeds access to your sealed headlights, yous take to remove any chrome, metal trim, or bezel that may embrace the headlight. To practice this, you may demand to utilize a special screwdriver such as the phillips-caput or a pozidriv tool. A metal screw ring is used to concur the sealed headlamp itself so you will have to unscrew them.
If your headlights are round, they will exist held with three screws. Rectangular units are held by four screws. These screws are different from the headlight aiming screws. The aiming screws come in two pieces per headlight and are located at either the pinnacle or bottom of the headlight. Be careful not to tamper with them while removing your headlight.
Pace TWO SPRAY THE SCREWS.
Before you endeavour to remove the screws holding the headlights, I recommend you spray them with a penetrating solvent. Or grease them with oil. This is to reduce the friction when unscrewing them to avoid widening the pigsty the screws go through. After you lot have greased or spray the screws, hold the headlamp and remove the remaining ring bolts.
Once you are done, lower the headlight advisedly from its receptacle. Yous will see a wiring connector that pushes onto prongs at the back of your sealed headlight. Detach them and set your headlights apart.
Footstep Iii: Wash YOUR HEADLIGHT THOROUGHLY WITH AN AUTOMOTIVE SOAP.
With your car's sealed headlights successfully detached and unsealed, utilise your sponge and a good specialized automotive soap to wash the surface and inside of your car'south headlights completely. Once you are washed, rinse thoroughly to ensure that particles of dirt, debris, and soap are removed completely from the within of your headlight. And so, wipe your headlight with a soft microfiber towel to dry out. Permit for most 5 minutes for your headlights to totally dry before attempting pace iv.
STEP Iv: APPLY A HEADLIGHT LENS RESTORER
Open up your restoration starter kit and with the start wipe found inside, clean your headlights thoroughly. In one case you are satisfied it'southward clean, dry the headlamps using the paper tower institute in the kit.
Before proceeding farther, expect for nigh two minutes and ensure both of your headlights are completely dry. So, open up the second package found in your restoration starter kit. Exercise non unfold, simply wipe both headlights gently for the last time. For the best results, permit a waiting time of most 30 minutes after the first wipe and you will exist amazed by how incredibly clean your sealed headlights await.
Subsequently your car headlight restoration, avert getting your headlamps wet for at to the lowest degree half an hour so that the formula in your clear light tech restoration kit volition keep to piece of work and remove whatever oxidation you left untouched from your headlight.
Step FIVE REASSEMBLE YOUR SEALED HEADLIGHTS
Once y'all are done cleaning your headlights, before plugging dorsum the wire connector onto the back of the restored headlight, employ an droplets electrical contact cleaner to wipe any corrosion from the socket connector. a
Attach the wiring connector with the prongs.
Ready back the headlights in their respective receptacle. Scout out for the small bumps effectually the outer border of the headlight'south and ensure each of them align with the minor openings in the headlight socket. Besides, make sure that the headlights and their lenses are installed upright.
Next, gently hold your glass sealed beam and place the aiming screws and the screws holding the headlights to the machine frame. If you notice that ring bold is damaged, y'all should buy a new ane. Later on tightening the aiming screws, reinstall the metal trim covering the light and hold them together with the bezel.
NB: yous shouldn't wash your car for the next 24 hours to allow a complete restoration cycle.
Finally, to make sure your sealed headlights remain clean, wait new, and remain resistant to oxidation for another couple of years, I would recommend y'all regularly make clean and maintain them.
Similar this commodity? Share it with others!

Source: https://headlightrestore.us/how-to-clean-the-inside-of-a-sealed-headlight/
Posted by: devinneyspeorne1972.blogspot.com
0 Response to "How To Clean Film Off Car Headlights"
Post a Comment